If your fish don’t seem to like flake or frozen foods, then you may need to provide them with live food. Not only will live prey satisfy their appetite but chasing it around will keep them entertained, too.
Blackworms are a great live food to feed your carnivorous fish, and they’re quite simple to raise as well. Should they be in your new aquarium farm?

Let’s take a look at what blackworms are, what kinds of fish eat live blackworms, and how to start a blackworm culture of your very own.
Contents
What Are Blackworms
Blackworms are a type of freshwater worm, primarily raised as live food for fish or as science experiments.
They can be found at the edges of ponds, lakes, or marshes throughout North America and Europe, where they feast on decaying vegetation and microorganisms.
You can easily find blackworms hidden under decomposing leaves, submerged rotting logs, or crawling through sediment surrounding budding plants such as cattails.
Blackworms found in nature also tend to be much larger than those bred for fish food.
Blackworms As Fish Food
Live blackworms’ rich nutritional content, as well as their resilience against various changes in water conditions, makes them the perfect live food to raise for your fish.
They’re also rather cheap! You can buy about a large tablespoon’s worth of blackworms for only a few dollars from your local pet or specialty store.
Even just one scoop of blackworms in your aquarium can feed three or four small fish for at least one week.
Which Fish Eat Blackworms?
If you find that your fish are surprisingly picky with their diet, it’s best to start offering them blackworms as soon as possible.
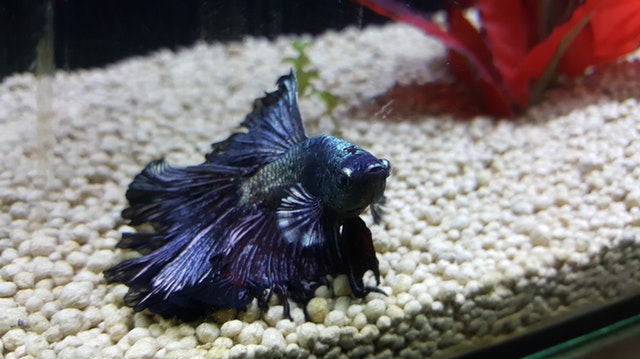
Many types of carnivorous tropical fish, such as bettas or breeders, like to eat food that they can hunt down – transforming live foods into both a food source and a fun pastime. Most fish find them hard to resist.
In fact, some fish will only ever eat live or frozen foods. Dwarf puffers especially rely on an abundance of blackworms in your fish tank to maintain a healthy, round weight.

How Many Blackworms Do You Need for Food?
Keep in mind that while blackworms are extremely good for fish, they should not be their only meals. Blackworms do offer plenty of nutrients on their own, but they are only one part of a balanced fish diet.
You should feed your fish small amounts of live blackworms every day on top of a pellet or flake food diet.
Bettas also thrive on variety, so it’s smart to change up the type of live foods they hunt every now and then. Otherwise, they may grow bored or, worse, sickly, missing other nutrients that are vital to their health.
How to Cultivate Blackworms
How you culture your worms will depend on how many (and how often) you plan to harvest them for fish food.
If you only want to give blackworms to your fish as an occasional treat, then feel free to grow a small culture in a five- to ten-gallon tank alongside some dwarf shrimp.
However, if you want to use blackworms as a staple food for your tank occupants, then you should create a dedicated tank just for them.
Here’s a video showing an example of a blackworm culture setup.
How to Set Up a Blackworm Tank (Paper Towel Method)
Line Some Paper Towel Strips
First, cover the bottom of their tank with small, brown or organic paper towel strips. The paper towel strips act as a fibrous substrate of decomposing material, making it a very effective way to breed your blackworm culture.
Dechlorinate the Water
No matter the tank size you choose for your blackworm culture, make sure it isn’t the type that will leak toxins into the water.
Be sure to only fill it up with two or three inches of dechlorinated water. Blackworms prefer shallow waters because they need at least some air to breathe and thrive.
You should use spring water if possible, but well-aged tap water or aged aquarium water from a previously well-established aquarium is also a good alternative, depending on where you live.
To dechlorinate tap water, simply leave it out for around 24 to 48 hours or just add a dechlorinating agent to it.
Cut Your Worms
You will need to cycle your tank before placing the blackworms inside. After this, get your starter culture. If you refrigerated your worms, do not immediately dunk them all into the tank.
You should first warm the worms up until they are about room temperature. Of course, if you didn’t refrigerate your culture, just skip this step.
Next, pour them into a small container, so you can cut your culture in half twice. This won’t kill your blackworm culture, but rather jumpstarts their growth even further.
They will regenerate new heads, tails, or both ends within just a few hours or so of being in their new tank. It will take them anywhere between two to three weeks to grow back to their full size. Their growth rate will depend on how often you feed them, as well as the temperature you keep their tank at.
Their tank should always be kept at room temperature (or somewhere between 68 to 77 degrees Fahrenheit), though they grow the fastest at around 70 degrees Fahrenheit.
In fact, their population will roughly double every four weeks or so if you keep their tank at this temperature.
Add Some Substrate
After you have lined their tank with paper towels and added their dechlorinated water, include some substrate.
Blackworms need their tanks to be gently aerated at all times, so you will need an air stone, an air pump, and/or a small sponge filter.
The sponge filter will help to stabilize your growing blackworm culture, but you will also need to include an air stone, or else risk a slower growth cycle.
This is because air stones increase their numbers and the likelihood that these blackworms will break themselves up into smaller pieces, which is one of their methods of reproduction in captivity.
Changing the Water and Paper Towel Strips
You should change your blackworm culture’s water every two weeks or so. Depending on the type of paper towels used, the little strips should last about 10 to 14 days before they need to be replaced.
Always keep an eye on the towel strips in your blackworm tank, as these will indicate when you should change their water. Let it get too grimy, and you may find your worms reproducing far slower.
If you are particular about keeping their water extremely clean, then you may need to change their water once every week instead. Any more frequently may also harm the worms’ health.
To change the water, carefully pour out most of it (about 1/2 or 3/4 of the water should suffice) into a sink, using a kind of netting to ensure your worms don’t go with it. Next, pour the remaining water into a container.
Using the net, rinse your worms off with some fresh, dechlorinated water before reintroducing them to the leftover water.
Once this is done, throw out the old paper towel strips and clean the walls of your tank thoroughly. Then, add in new paper towel strips all along the bottom once the tank is dry and top it off with two to three inches of fresh water.
Put your blackworms back in and repeat as needed.
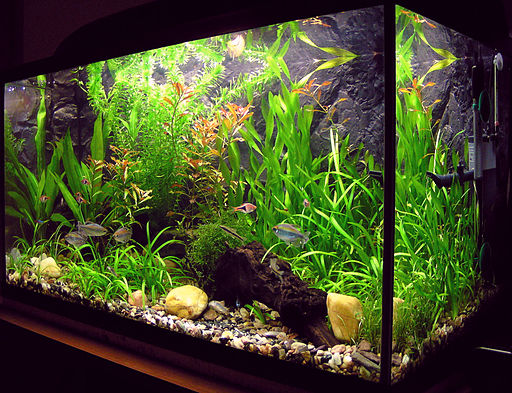
How to Set Up a Blackworm Tank (Gravel and Plants Method)
The paper towel method described above is an effective way to breed blackworms for your fish, but it’s also very messy and you may lose some worms while you complete water changes.
Another method is to line the bottom of the tank with a combination of aquatic plants and gravel instead.
The type of tank you choose should, like in the paper towel method, be one that will not leak any toxins into the water. The dechlorinated water, cutting them in half, and water changing requirements are the same as well.
The main difference between these two set-ups is the substrate you use to decorate your tank. Rather than lining the bottom with paper towel strips, you should use a thin layer of gravel (about one piece thick) and several aquatic plants.
This method tends to be far more stable than the paper towel method, but the set-up does come at a cost; namely, purchasing the plants and substrate.
Providing Blackworms Additional Food
Broken down paper towel strips actually help feed your blackworm culture, as well as all the other small organisms in their tank, meaning you will not have to feed them as often.
By using substrate instead, you will need to give your blackworms an additional source of food. The best foods for blackworms include half zucchinis medallions or spirulina pellets.
Be sure to only feed them one pellet at a time and to remove the zucchini after 24 to 48 hours. Any rotten food is sure to contaminate your tank and kill off a great majority of your blackworm culture.
How to Harvest Blackworms
As your blackworms continue to grow and reproduce, you should harvest any excess worms to use as fish food.
To gather them up, simply suck them up via a pipette, use a net, or pick them up with curved tweezers and place them into your fish tank of choice.
Breeding Blackworms
Blackworms can reproduce both sexually and asexually.
Asexual reproduction is accomplished through fragmentation, which is when a blackworm will spontaneously divide into two or more fragments that will then become their own separate worms.
These ends that split off will also rapidly regenerate, making each individual blackworm a perpetual combination of old and new fragments. You may also speed up this process by manually cutting them in half yourself.
All blackworms are hermaphrodites, meaning that they have both male and female sexual organs. Because of this, they can sexually reproduce with pretty much any member of their species.
If they have reproduced sexually, you may see transparent cocoons inside their tank. Each cocoon contains anywhere between four to eleven fertilized eggs. Small worms, about one centimeter in length, will later emerge from these cocoons in two weeks’ time.

While culturing blackworms is relatively easy, breeding them does come with one downside: they don’t reproduce as quickly as other kinds of live foods.
You may be able to harvest a few worms from your culture each day, but you will quickly deplete your blackworm population if you feed your fish copious amounts of them.
How to Keep Blackworms Alive
Feeding blackworms is actually quite simple. Their diet typically consists of the bacteria that forms on the unbleached paper towel strips, as well as some form of crushed fish food, such as flakes or sinking fish foods.
Again, if you have the gravel and plant set-up, then you will need to provide your blackworms with additional food. Blackworms can survive on very little food a day, but they will grow much faster if you feed them often. Just keep in mind that the bigger the culture, the more waste they will produce.
Beware of overfeeding them, however. If any food is left in the tank too long without being consumed, it can pollute the water in the tank and kill your culture. Blackworms are able to survive irregular feedings or weeks of starvation as long as their tank water doesn’t become contaminated.
When handling your worms during water changes, be sure to never use forceps or hooks to move them. These instruments will easily injure them.
If you are handling dead worms, be sure to wear gloves. Once you take them out, wrap them up in a plastic bag that is tied tightly before you toss them in your garbage.
Hee’s a video going into more detail on keeping live blackworms.
Conclusion
Breeding blackworms for fish is far easier than you may think. They are also a great source of protein and other important nutrients that your fish will surely appreciate.
If your carnivorous fish refuses to eat the normal flake or pellet foods, then try feeding them live blackworms instead!
Have you tried giving your pet blackworms? What were the results?